Posts

Bookmarks are used to navigate quickly to important or frequently used webpage in Google Chrome. Any page in SquidWeb can be saved as a bookmark to be accessed quickly from anywhere in the browser.

We recommend creating a folder for your SquidWeb bookmarks to keep them all in one easy to access place.

To create a folder, right click anywhere in the browser header and select “new folder” from the menu. Bookmarks can then be saved directly into this folder.

To save a new bookmark navigate to the page you wish to save and click the Star Icon to the right of the  address bar in the browser page header, make sure your folder is selected from the folder menu and click “Done”. The newly created bookmark will now be listed in the folder.

Working with bookmarks is a great way to improve your efficiency with SquidWeb, save a several pages that you regularly use on a day-to-day basis, we recommend the Today, mailbox and projects pages as your first bookmarks. At the start of each working day you can open the folder in Chrome and open all bookmarks in one action.

For full details and instructions on how exactly to create a folder and save bookmarks, watch our tutorial below:

Signatories can be added to a document in SquidWeb, this will allow the document to be signed digitally via the app and returned to the desktop version for storage.
This feature can be used when a new employee is hired in a separate branch to the CEO for example.
In the case of an employee contract, the contract can be generated with SquidWeb’s document template feature. The signatories are then added to it and it can be signed by a CEO in Düsseldorf and the new employee in Berlin without any need for printing or scanning.

This article will explain how to complete this process.

Workflow:
Add variables to document template
Add signatories to the document (Example doc here)
Select signature order
Allocate the signatories
Drag & drop signature container onto the document
Invite signatories to sign
Sign document

Add variables to document template

Before this feature is used to add digital signatures to a contract, the document template must be updated to correctly label the participants. To do this, add variables for the employee and employer to the bottom of your contract template like so:

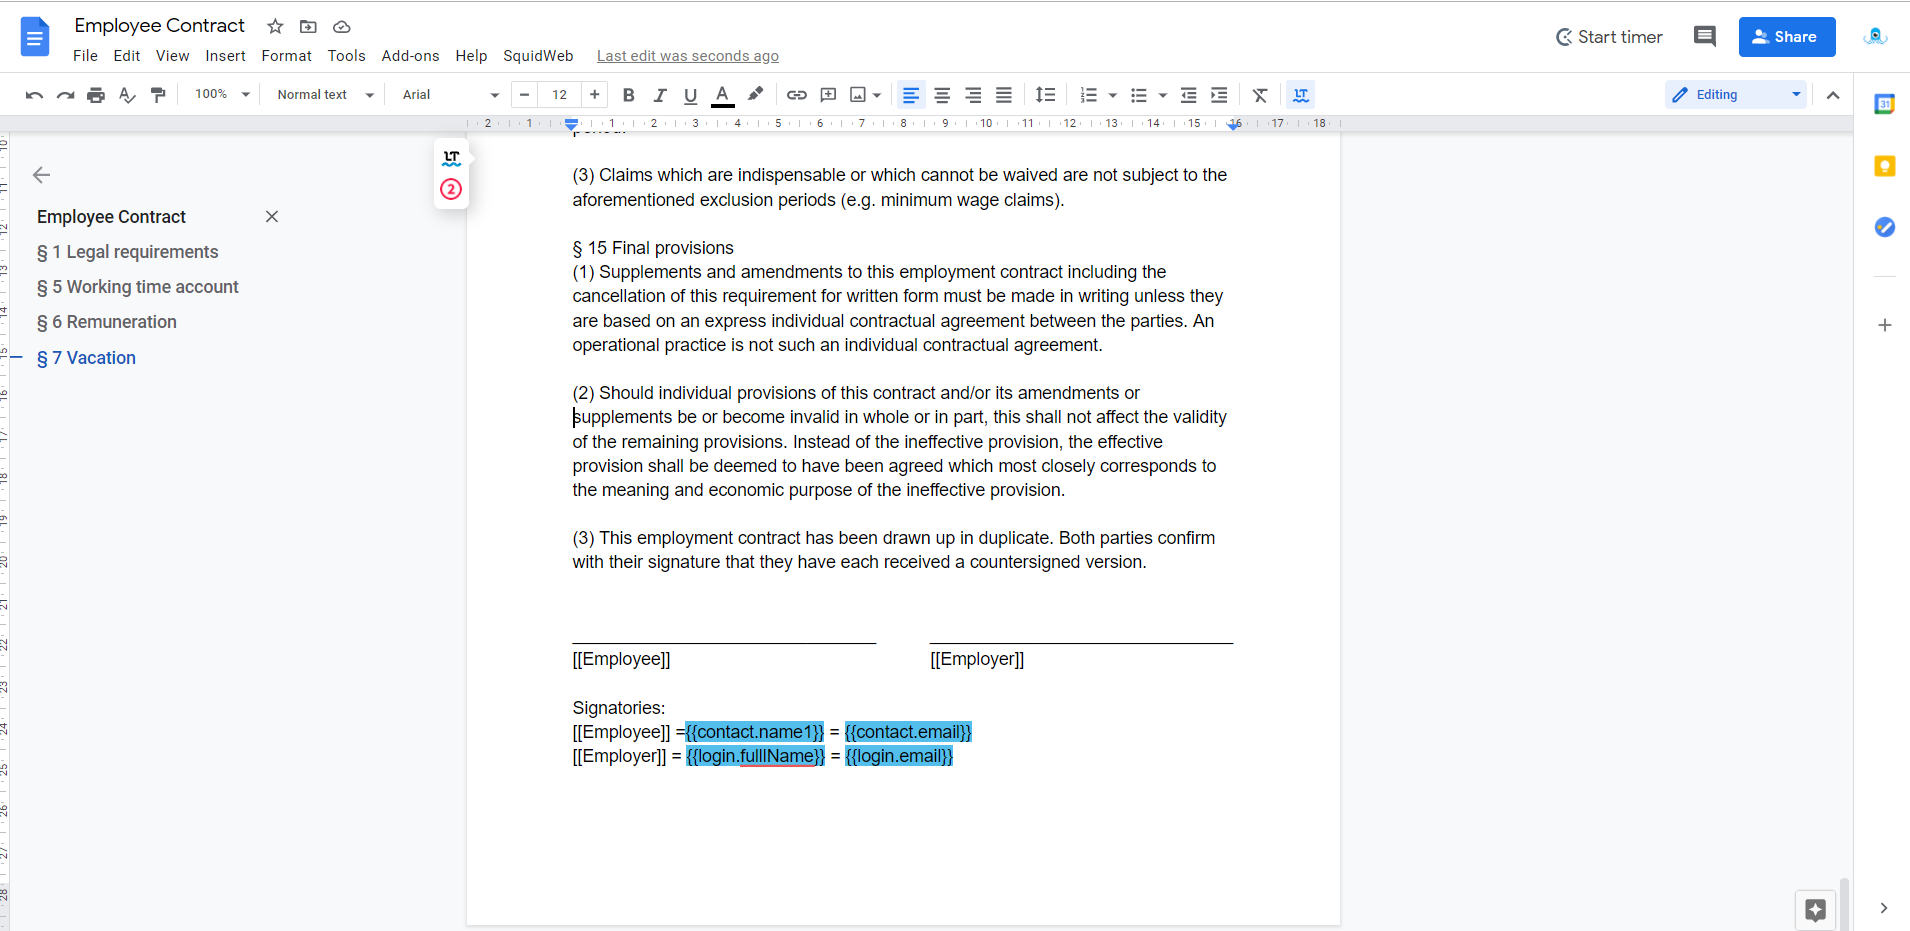
[NOTE: The variables are only highlighted blue for your information]

These variables will be replaced with the correct information when the document is uploaded to SquidWeb.
A copy of the example template document can be found here – EXAMPLE TEMPLATE DOCUMENT

How to add signatories to a document

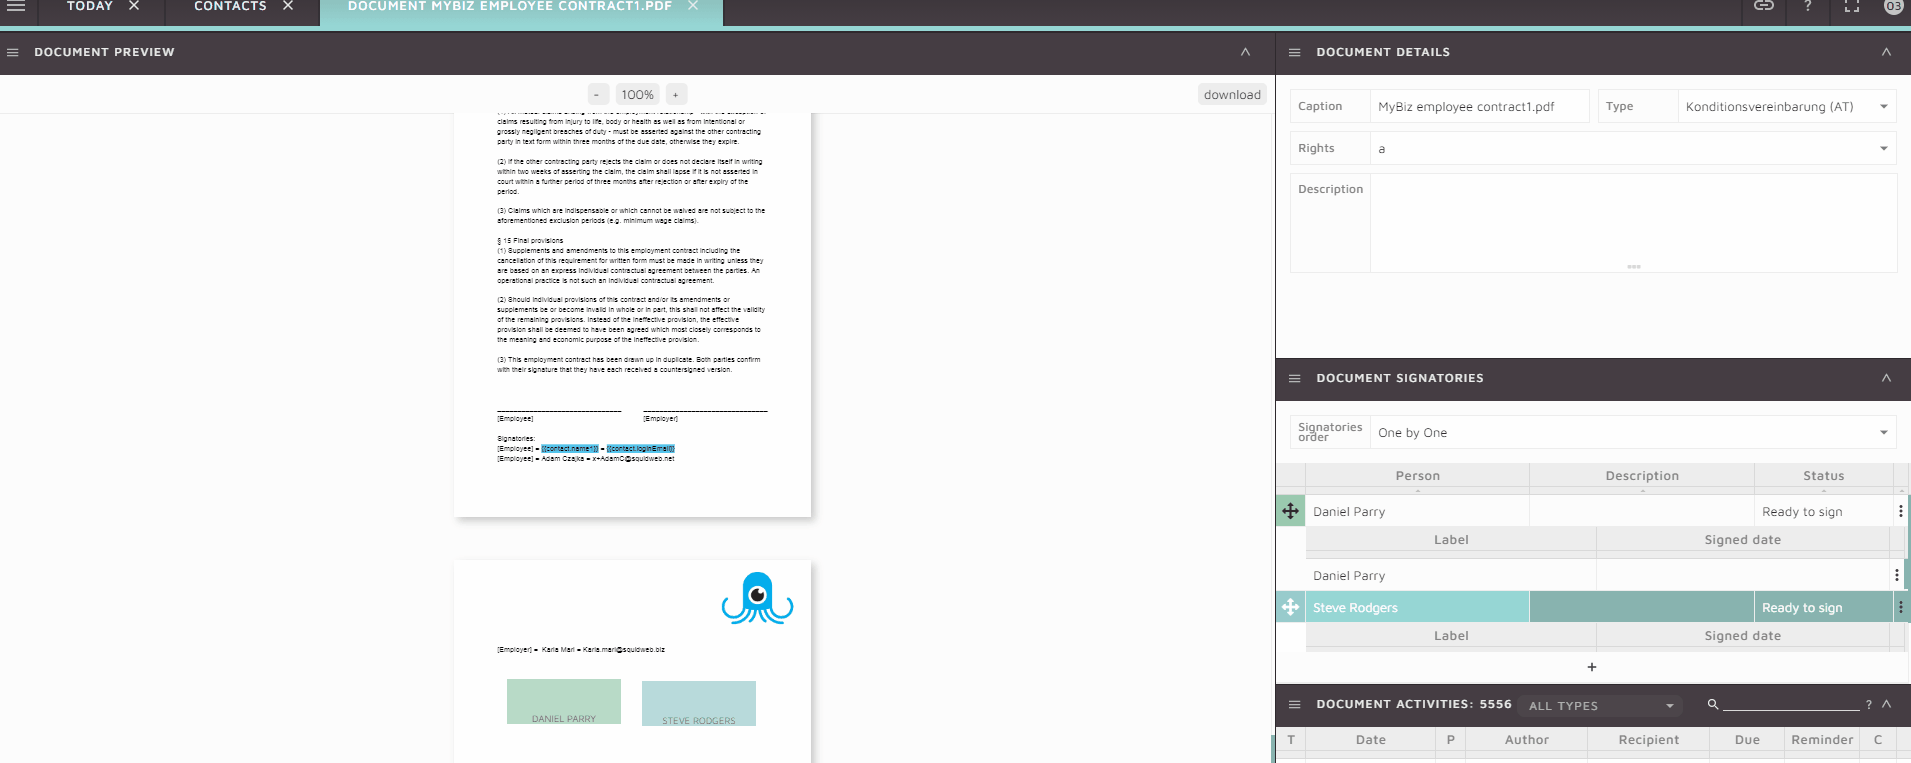
To add signatories to a document, first, open the document in SquidWeb so it can be viewed on the document preview page.
In the container menu select “Add signatories

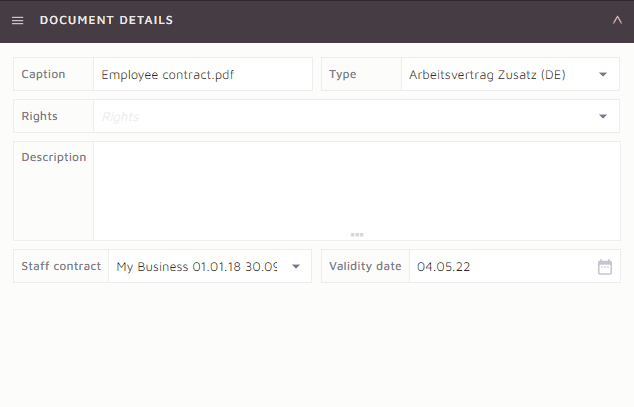
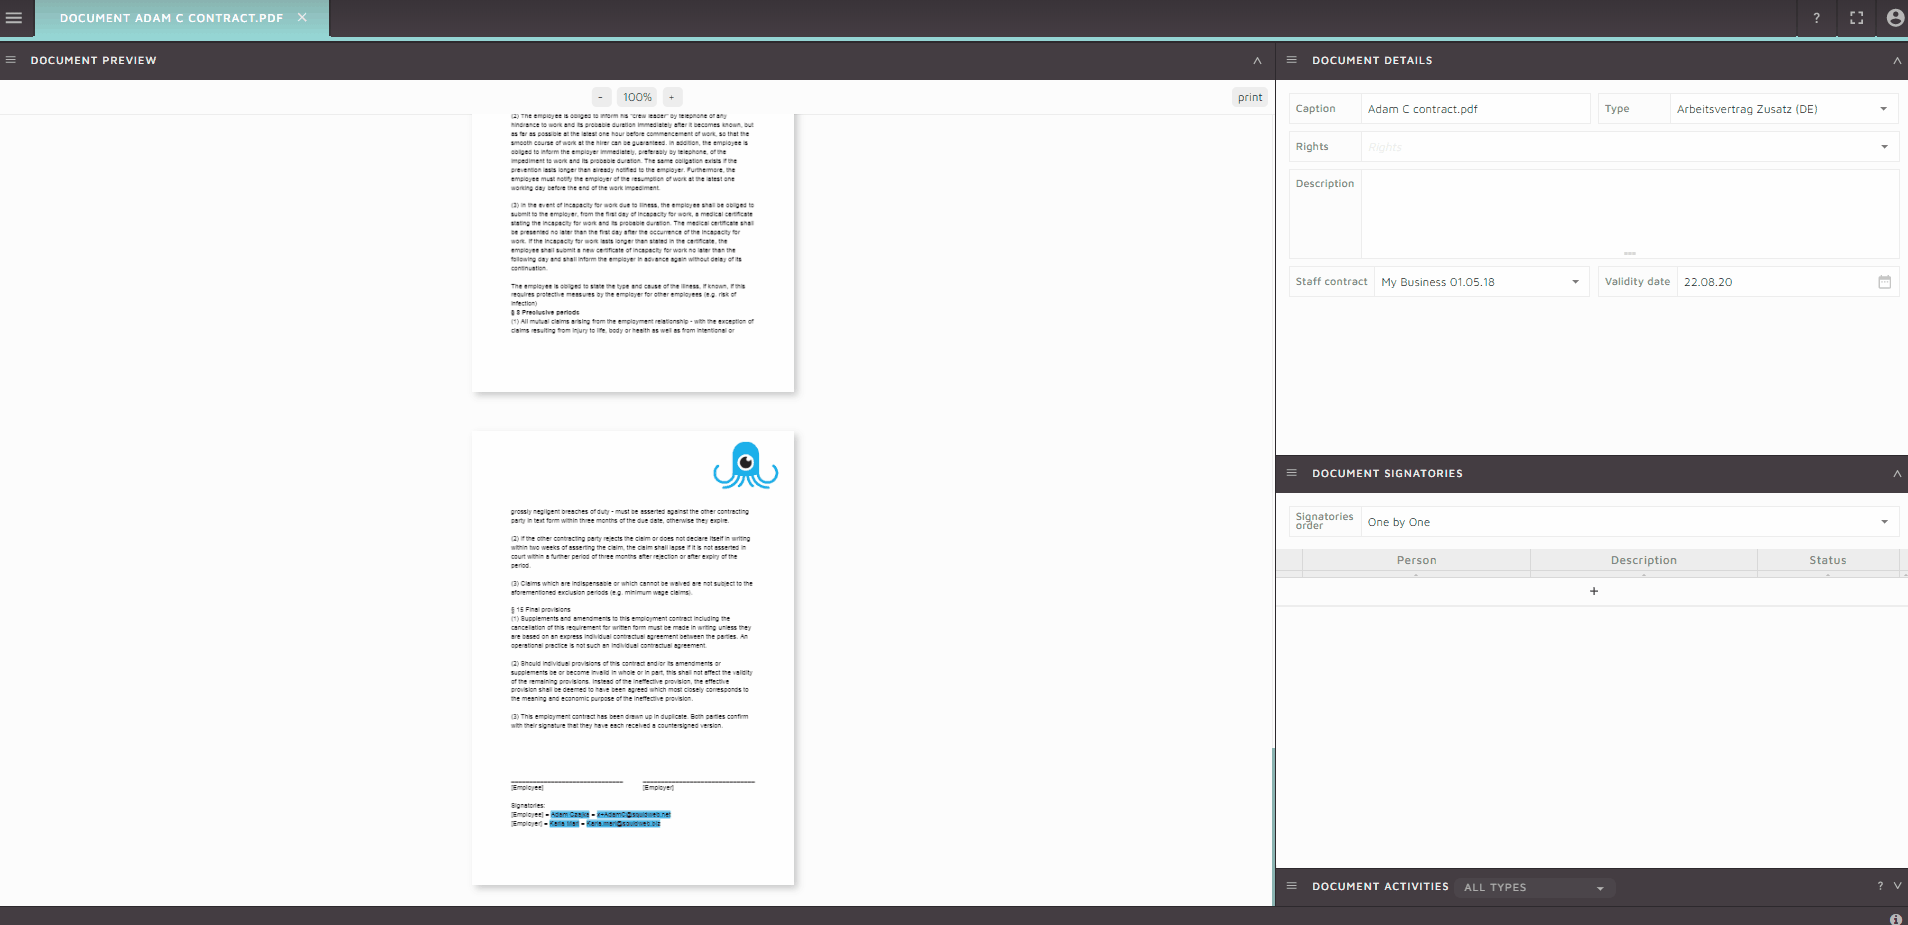
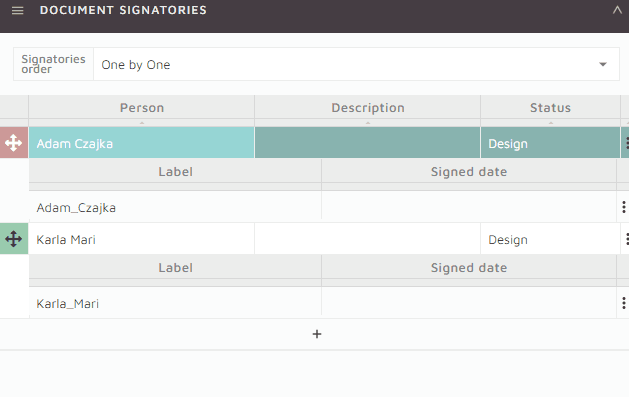
This will add the document signatories container to the document preview page, it will appear below the document details container in the SidePanel.
The document signatories container will allow you to choose who will sign the document, what order they will sign it in and send an invitation to the signatories to inform them they have a document to sign.
The gif below will demonstrate how to allocate a person to be a signatory on the document by selecting the ‘+‘ icon and choosing from all persons in your SquidWeb database.

There are two signatory orders to choose from:
One by One – the second signatory will only be able to sign document after the first signatory  has signed it.
Parallel – all signatories can sign in any order.

In either case the signatories will sign in the mobile on their own device.

Drag & Drop signature container onto document

Once the signatories have been assigned to the document, the space in which they are required to sign on the document can be set. This is done by clicking on the icon next to their name and dragging the container to the correct place on the document. Here is a gif to demonstrate:


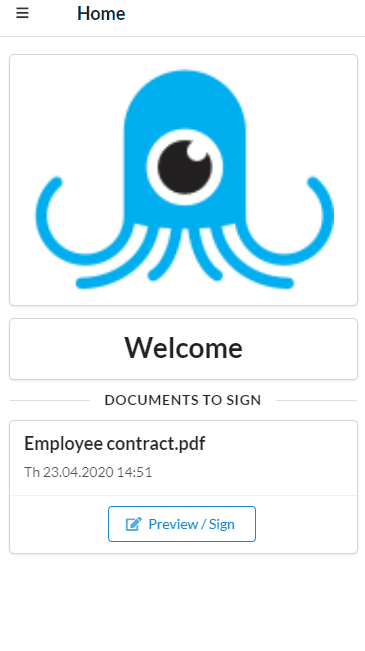
Invite signatories to sign/set status to ready

Right click on the signatories name and select “Mark as ready to sign” – once this status is set the document will appear on the home page of the app when the person next signs in.

An invitation may also be sent if the person needs to be informed to check their app. Right clicking on the signatory and selecting “Send invitation message” will trigger an email dialog with the MSGSignatoryInvite type templates included. This message will inform the user to login to the app and sign the document.

Signing the document

All documents assigned to a person that require a signature will appear on their app homepage under “Documents to sign“.
To complete the signature, select “preview/sign” to open the document PDF. Navigate to the designated signature area and tap it to trigger the signature dialog.

Various colors can also be selected to sign in.

Once the signature is complete the document will automatically be updated in SquidWeb.

Cancelling a Signatory Document – Contracts only

If a contract is refused, the signatories can be marked as cancelled and then removed from the document via the Document Signatories container menu.
Select the “Mark signatories as cancelled” option and confirm the action when prompted. The status of all signatories will be updated to “Cancelled” and any outstanding notification on the mobile app of the recipients will be removed.

Resources

EXAMPLE TEMPLATE DOCUMENT

SquidWeb WIKI


A Google doc can be uploaded to company settings with variables in place of interchangeable information and used as a template for reoccurring documents.

For example, a staff contract can be created in Google docs with variables in place of the employees name, contract details and starting date. The link to the document can then be added to SquidWeb so when a new contract is created the document can be generated with all the relevant information in place.

Check out our tutorial to show you exactly how:

Documents that have been uploaded to SquidWeb with the wrong orientation can be rotated 90° left of right.

Open the document preview page and right click on the PDF preview to open the rotate option menu.

Templates are the preset content for emails, messages and documents sent from Squid. 

If it can be sent from Squid, a template can be made for it. The more templates you have set up, the less time you have to spend writing emails and texts.

Set up your templates in multiple languages and Squid will give you the right template for the right contact.

SquidWeb wiki Tempaltes

The GUI is how you, the user, interact with SquidWeb. This includes all windows, icons, menus, pages and features that may be manipulated by the mouse or keyboard.

Understanding how SquidWeb’s GUI is laid out and how to navigate it, will help new users get started.

All of SquidWeb’s support and tutorial material are made for users with s basic understanding of SquidWeb terminology and design. This video will introduce you to SquidWeb and the tools to start working.

SquidWeb Wiki – GUI

You will receive a welcome email from SquidWeb support when you account is ready, this email will contain a unique URL link, follow it to set up your new password.

Once logged in for the first time you can edit your user settings to complete your account setup.

If you forget your password, use the forgotten password feature on the login page to send yourself a new link.

SquidWeb is full of shortcuts and features that will help make your life easier.

We have combined all the tips and tricks we learned from our users at the 2019 Squidlympics to create this ultimate user guide to efficient project creation.

Using these shortcuts will help you streamline your workflow and might help you out in the busy season…

Check out the video here!

Company stationery will be applied to all reports and documents created in SquidWeb so all your company’s important information is available for clients. There are some design criteria that need to be met when uploading your stationery to SquidWeb.

The stationery needs to be in the top 45mm and the bottom 50mm of the documents and it must be uploading in PDF form.

To see how its done check out this video!

Team ToDo’s are used to send messages to all users of a specific login type instead of an individual.

A Team ToDo can be created to all Accountants for example, instructing them to check all invoices before the months end.