
A document can be request from a contact in SquidWeb, if a crew members passport is out of data or a staff member’s driving license needs to be updated, a request can be sent to thier mobile device so they may upload a new copy.
The request can be made automatically be SquidWeb Robots when a validation date is reached, or it may be sent manually from Personal Documents container. Once the crew member submits a new copy in the mobile app, the document can be reviewed and confirmed by and office member:
Tag Archive for: documents
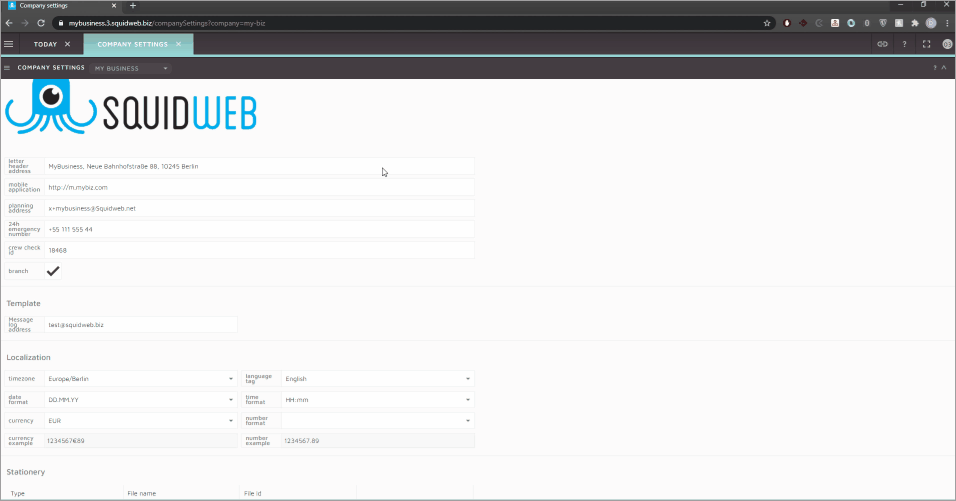
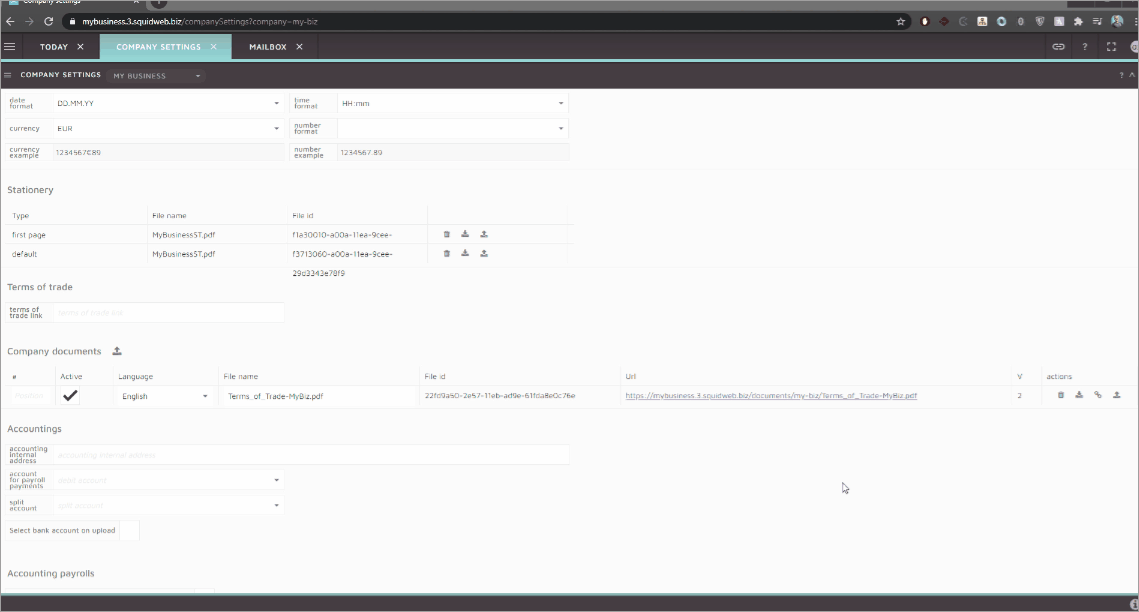
Company documents, such as terms of trade, can be uploaded via the Company Settings page in SquidWeb. Once uploaded SquidWeb will create a unique URL for the document that can be added to emails for clients to download when they please, even if the document is updated the URL will always be the same, so you will never need to send a new link.
To upload new company document:
- Navigate to Settings from the SquidWeb Dashboard main menu
- Select Company Settings
- Scroll down to the “Company documents” section
- Select the upload icon
- Select the PDF from your device
Updating a document can be done at any time by simply uploading a new PDF to Company Documents.
To upload a new version of a document, use the Action menu on the right of the section and select Upload before choosing your file.
The version counter will indicate which version is currently uploaded to the system:

The URL does not change when the document is updated – This is because it may be used as a download link for the document. Clicking the hyperlink icon in the Company Documents action menu, located on the right of the upload, will copy the URL to your clipboard. Pasting this, into an email for example, will produce a link to the document that will automatically download when clicked. The latest version of the document will always be assigned to this URL. Even if you have updated the document multiple times, when a user clicks this link, they will always be directed to download the most recent upload:
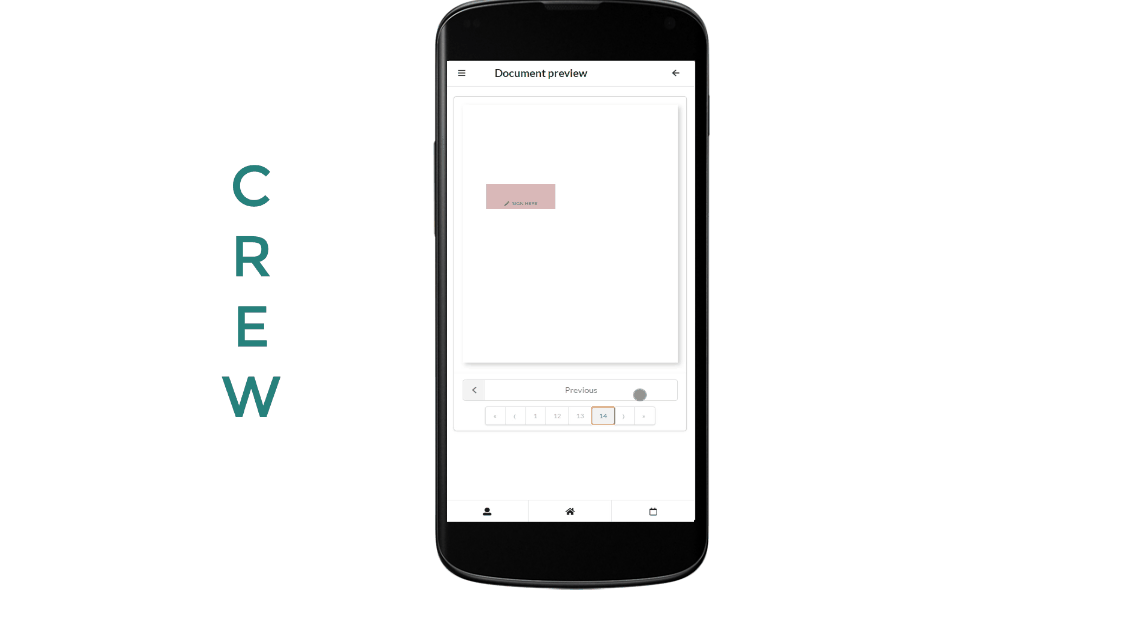
Crew trainings and documents that require a crew signature can be created in SquidWeb and sent to crew members to complete via the mobile app.
Documentation provided by a client that must be completed before a project start may be signed using this feature – all crew will receive a notification on their mobile device, access and view the document, sign it and returning it to the office, all from the app.
Once signed and return, the crew members also receive and email with their own copy of the signed document as an attachment.
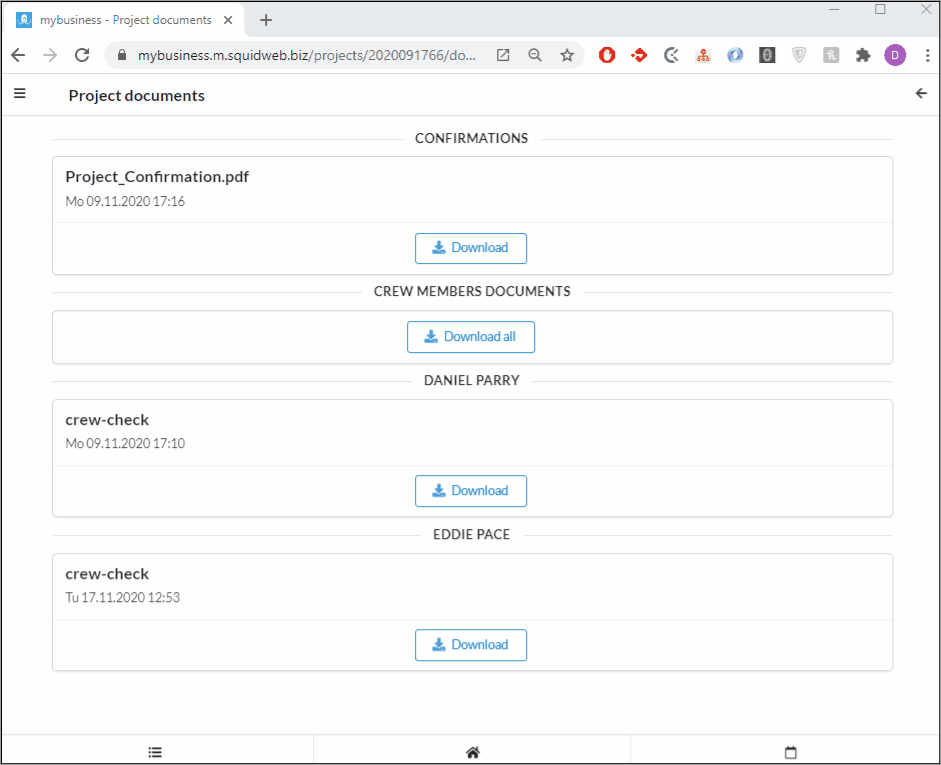
Clients may also access all signed crew member documents that relate to their project. By logging into their account and accessing their project documents they are able to download individual crew member documents or all documents as a ZIP file. 
Downloaded project documents will arrive as a download link to the clients personal email address. Following this link will download a ZIP file to your devices (mobile or desktop).
The ZIP file will contain all the individual crew members as a folder – each with the crew members personal documents included.
Robots can be set up to send crew training or documents automatically according to set parameters. If for example a document requires all crew members to sign every 6 months, the robot will check through all crew members in the database and automatically send a renewal request to any crew that have exceeded the deadline.
↓↓ Check out our tutorial for a better look! ↓↓
Signatories can be added to a document in SquidWeb, this will allow the document to be signed digitally via the app and returned to the desktop version for storage.
This feature can be used when a new employee is hired in a separate branch to the CEO for example.
In the case of an employee contract, the contract can be generated with SquidWeb’s document template feature. The signatories are then added to it and it can be signed by a CEO in Düsseldorf and the new employee in Berlin without any need for printing or scanning.
This article will explain how to complete this process.
Workflow:
Add variables to document template
Add signatories to the document (Example doc here)
Select signature order
Allocate the signatories
Drag & drop signature container onto the document
Invite signatories to sign
Sign document
Add variables to document template
Before this feature is used to add digital signatures to a contract, the document template must be updated to correctly label the participants. To do this, add variables for the employee and employer to the bottom of your contract template like so:
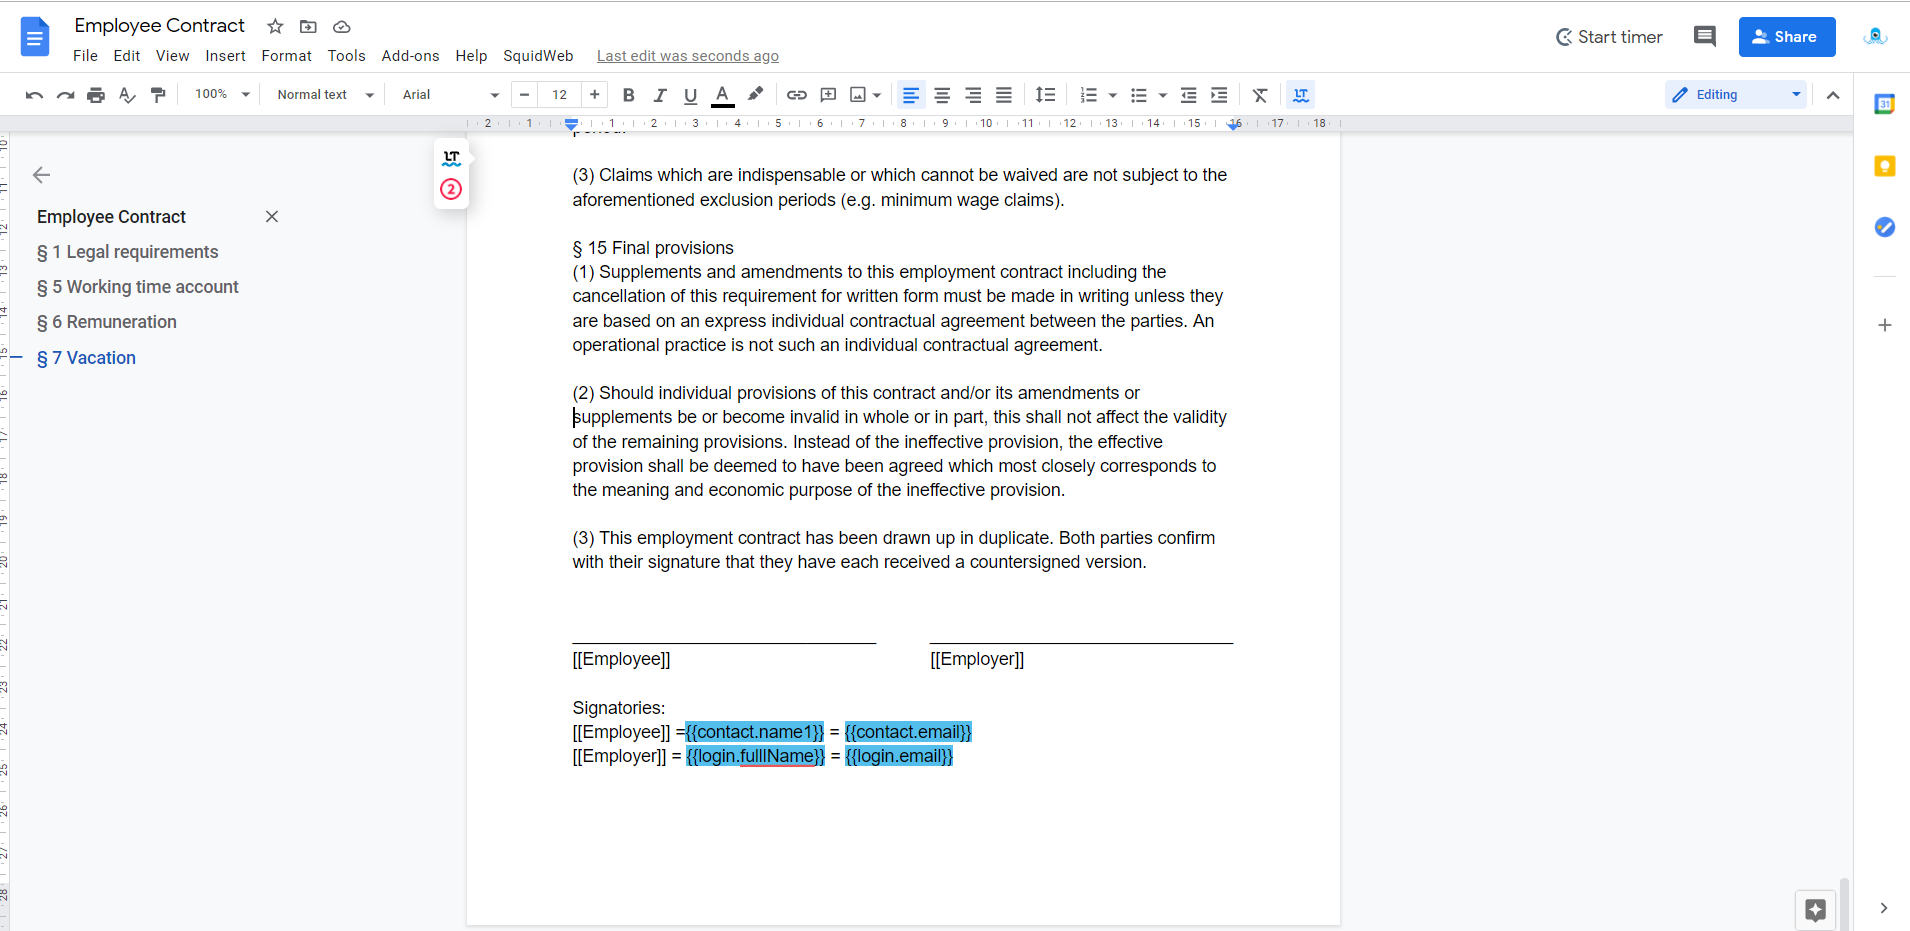
[NOTE: The variables are only highlighted blue for your information]
These variables will be replaced with the correct information when the document is uploaded to SquidWeb.
A copy of the example template document can be found here – EXAMPLE TEMPLATE DOCUMENT
How to add signatories to a document
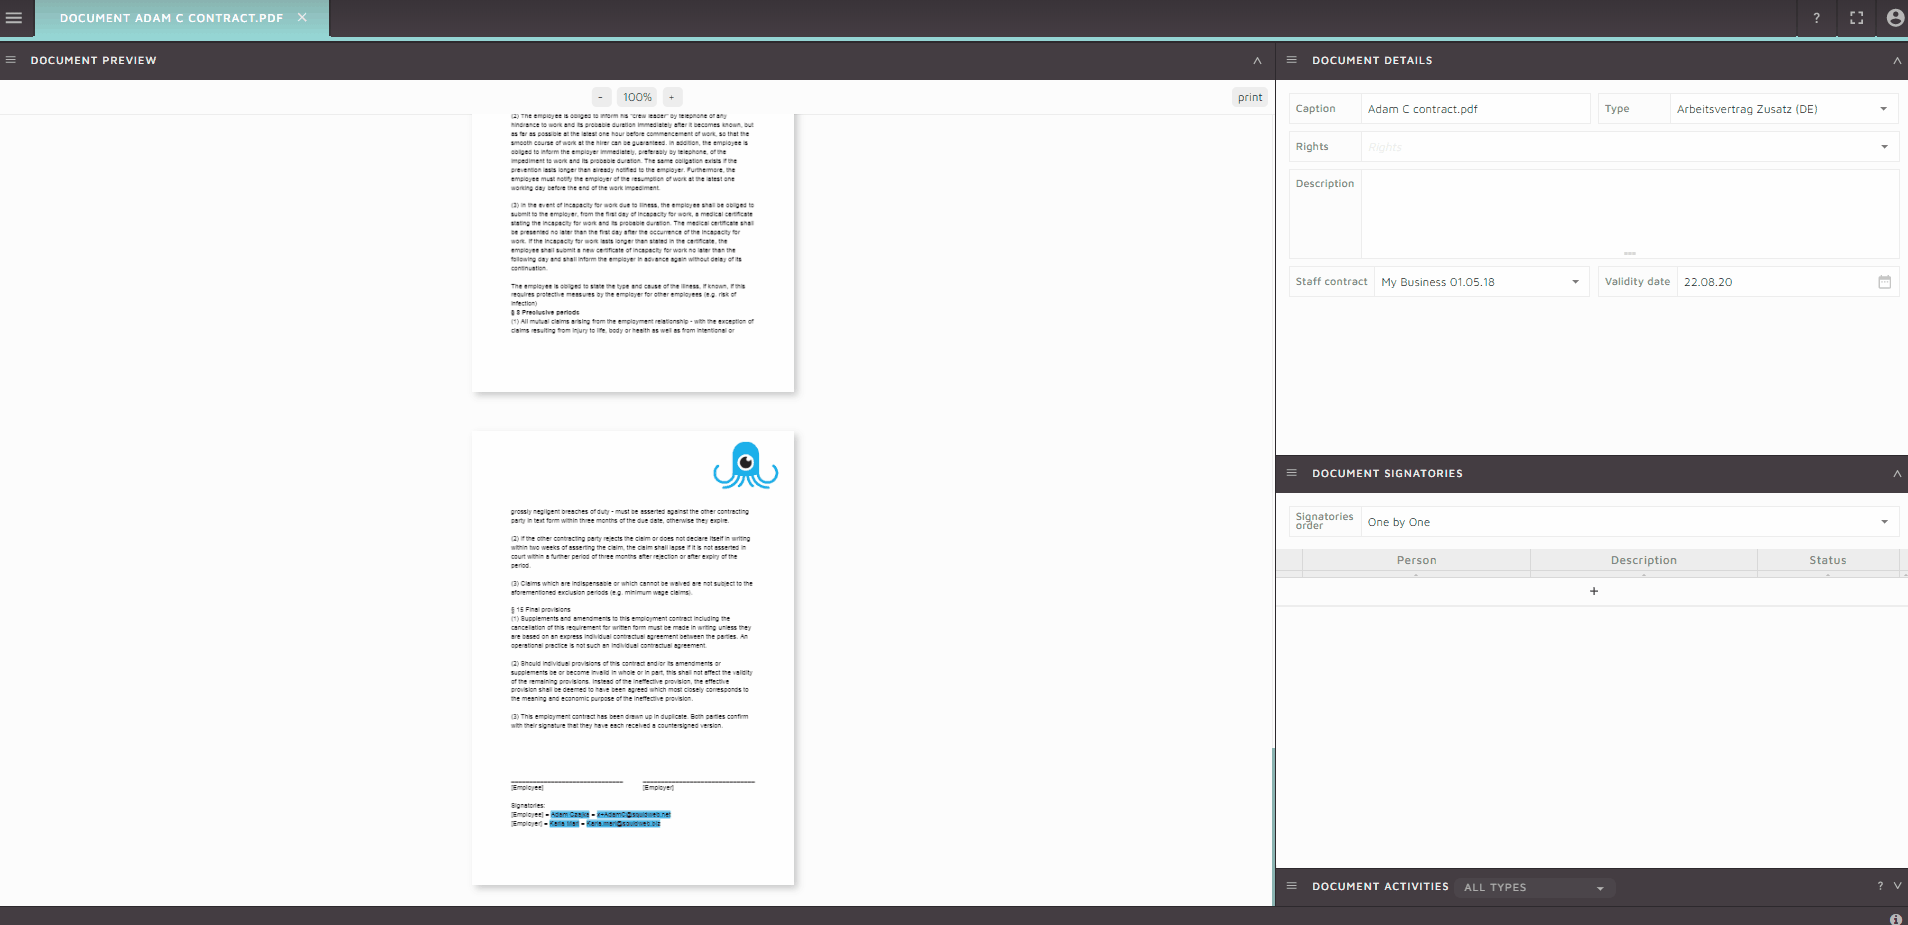
To add signatories to a document, first, open the document in SquidWeb so it can be viewed on the document preview page.
In the container menu select “Add signatories”
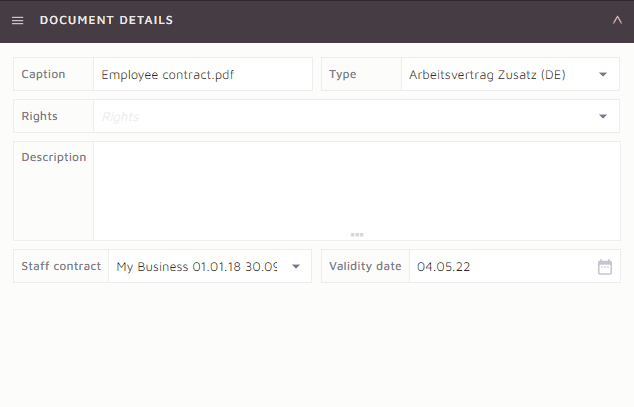
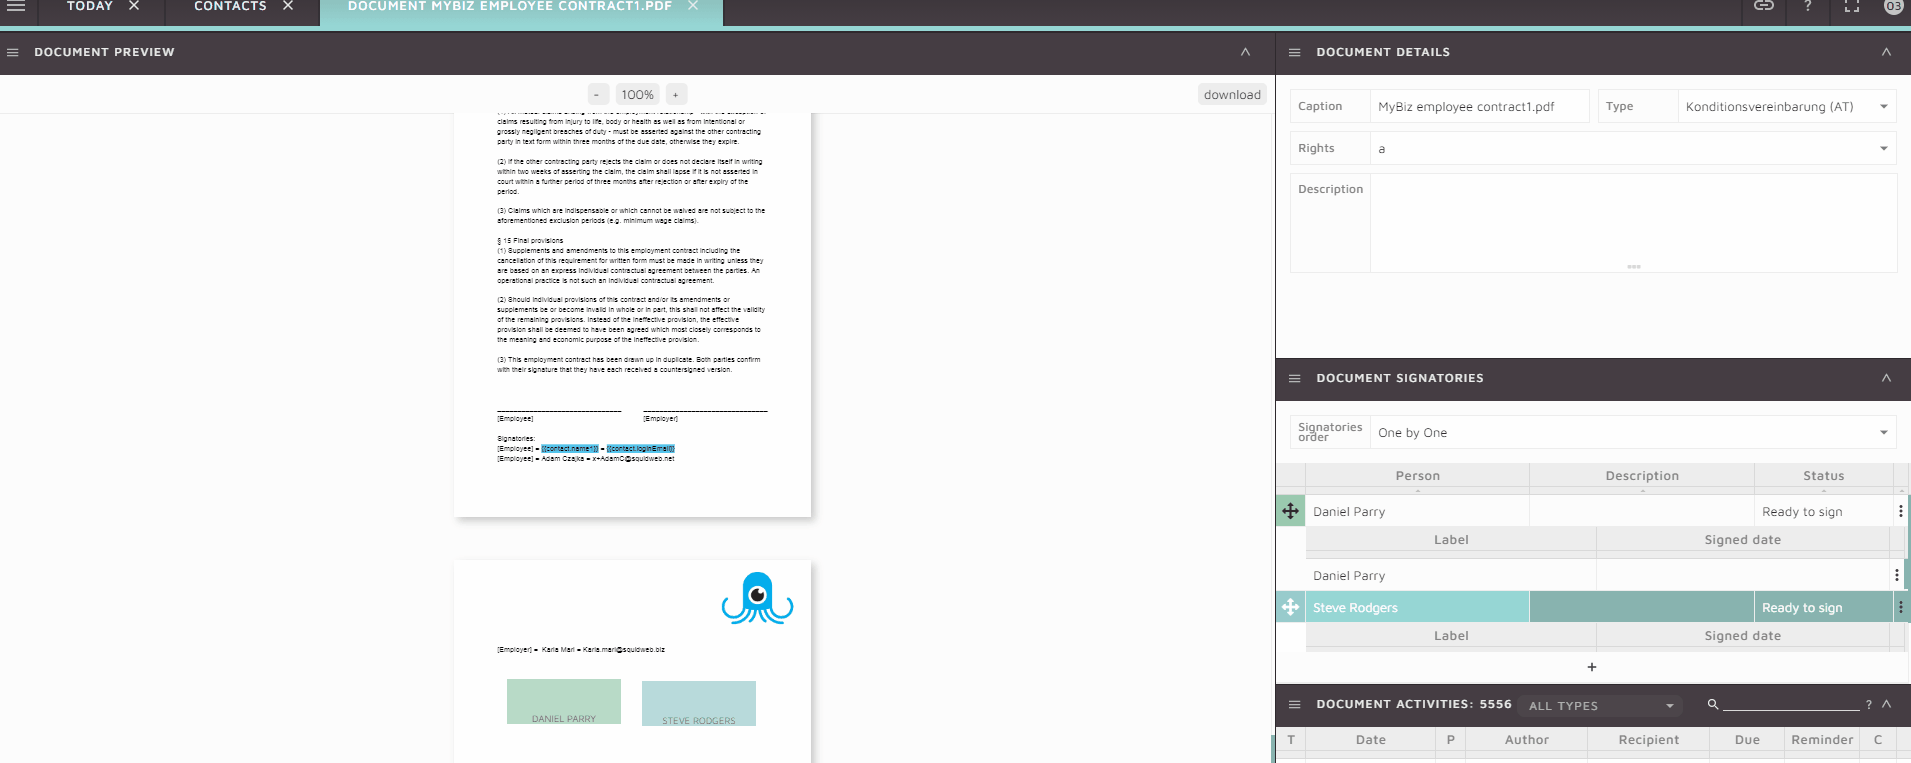
This will add the document signatories container to the document preview page, it will appear below the document details container in the SidePanel.
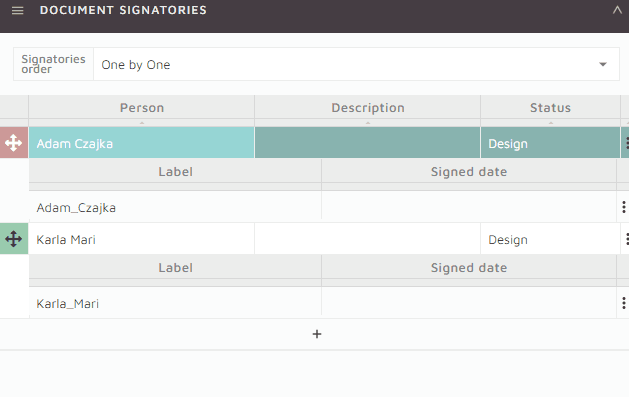
The document signatories container will allow you to choose who will sign the document, what order they will sign it in and send an invitation to the signatories to inform them they have a document to sign.
The gif below will demonstrate how to allocate a person to be a signatory on the document by selecting the ‘+‘ icon and choosing from all persons in your SquidWeb database.
There are two signatory orders to choose from:
One by One – the second signatory will only be able to sign document after the first signatory has signed it.
Parallel – all signatories can sign in any order.
In either case the signatories will sign in the mobile on their own device.
Drag & Drop signature container onto document
Once the signatories have been assigned to the document, the space in which they are required to sign on the document can be set. This is done by clicking on the icon next to their name and dragging the container to the correct place on the document. Here is a gif to demonstrate:

Invite signatories to sign/set status to ready
Right click on the signatories name and select “Mark as ready to sign” – once this status is set the document will appear on the home page of the app when the person next signs in.
An invitation may also be sent if the person needs to be informed to check their app. Right clicking on the signatory and selecting “Send invitation message” will trigger an email dialog with the MSGSignatoryInvite type templates included. This message will inform the user to login to the app and sign the document.
Signing the document
All documents assigned to a person that require a signature will appear on their app homepage under “Documents to sign“.
To complete the signature, select “preview/sign” to open the document PDF. Navigate to the designated signature area and tap it to trigger the signature dialog.
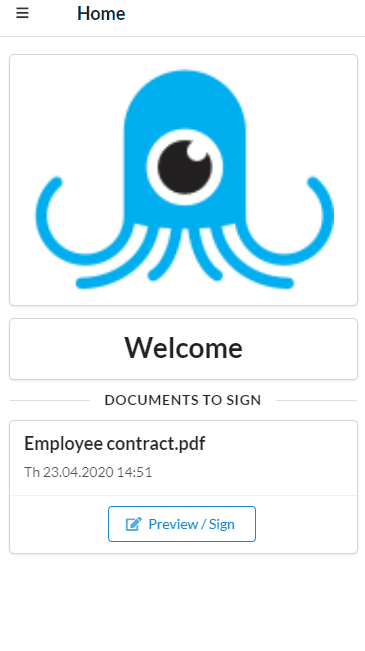
Various colors can also be selected to sign in.
Once the signature is complete the document will automatically be updated in SquidWeb.
Cancelling a Signatory Document – Contracts only
If a contract is refused, the signatories can be marked as cancelled and then removed from the document via the Document Signatories container menu.
Select the “Mark signatories as cancelled” option and confirm the action when prompted. The status of all signatories will be updated to “Cancelled” and any outstanding notification on the mobile app of the recipients will be removed.
Resources