
Tag Archive for: Accounting
The mailbox autoresponder can be set when you are on vacation of absent for any reason. Once set up all incoming emails to the chosen mailbox will be automatically replied to with a preset response.
To set the autoresponder navigate to the mailbox settings and set the Autoresponder section to active. Once active you may select a timezone, this is important as specific times may be chosen for the autoresponder to be active for each day of the week and if you client are in other parts of the world an incorrect timezone may cause your autoresponder not to be sent. A template can be used or a custom message my be added to an autoresponder email, in either case variables are available to be added.
{{date}} – representing the current date
{{nextAvailableDate}} – represent the next a date in the crew planner your user account is not booked for.
These variables will be replaced when with the corresponding value when the email is triggered. Adding these two variables to your autoresponder message template allows the same template to be used multiple times without the need to manually change the dates you are out of the office.
Finally, as mentioned, the exact time of day the autoresponder is active can also be defined. Each day of the week may be customized to allow for inconsistent absences (9am-1pm on Tuesday and Wednesday for example), however adding “0” to a day will automatically set the responder as active for the entire day. Details on this and more are explained in the tutorial below:
SquidWeb mailbox has a number of features designed to help you manage your mailbox quickly and easily. Here are a few of our recommendation to help you work quickly and efficiently:
Keyboard Shortcuts:
Select and email and press the following command to perform the action.
CTRL + A: Reply;
CTRL + C: Mark as spam;
CTRL + D: Mark as done;
CTRL + G: Refresh grid;
DELETE: Delete mail
Using keyboard shortcuts:
Move to done
If you have multiple emails that are “Read-only” in that they do not require a response or any further action from you or your colleagues, mark this as done right right away: Hold SHIFT to select multiple emails and press CTRL+D
Mark as Spam
Select multiple emails with SHIFT and press CTRL+X. The email status will change to “Deleted” but they will still be in the mailbox until the page is refreshed, press CTRL+G to refresh the grid and remove the marked spam. The page does not refresh automatically incase you make a mistake and need to change a status back from deleted or add additional mail to the spam list.
Reply quickly
To write a response, select the mail in the mailbox and press CTRL+A to instantly open the reply email dialog, type the body of text and when you are done simply press CTRL+ENTER to send the mail without needing to click.
Default mailbox
If you set a default mailbox, new mail will be sent from that address by default and you can filter the mailbox to display only your default mailbox by selecting the “Default” button in the header.
Choosing a default mailbox is simple:
- Navigate to your profile settings in the top right corner of the dashboard
- Select ‘User Settings’
- Select your chosen mailbox from the ‘mailbox’ dropdown menu
- Save
Mailbox filter, status indicators and search function
The mailbox filter allows you to manually select which mailbox is displayed whereas selecting the “default” button will show your chosen default mailbox. When opening the filter you will be able to select from all the mailboxes your user account has access to, both public and private mailboxes will be available to select.
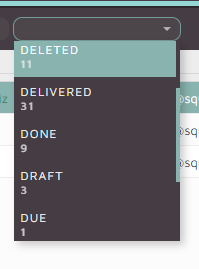
You will notice a list of numbers below each available mailbox, these numbers represent the amount of emails in each status in this order:
Received/Ongoing/Assigned/Auto-Assigned/Delivered/Done/Deleted
The amount of mails in the selected mailbox is also displayed in the status filter menu
The mailbox allows full text search which means sender, subject and email body search.
Additional tips
Drafts:
If you accidentally close your tab or the new email dialog, your mail will be automatically saved as a draft that can be accessed at any time. To find a draft email select the “Draft” from the status filter.
Show History:
To view only the email history between the selected mailbox and a specific contact, right click on any email from the contact and select “show history”, this will filter out any other mail from the mailbox that does not include this contact. There is also a container in the SidePanel titled ‘Email history’ that will display the same content.
An Email can be marked as spam in the Mailbox by selecting it and simply pressing CRTL + X.
The email content field will be automatically updated to “SPAM” and the status will be set to “Deleted” once the mail is marked as SPAM, it will also disappear after the page is refreshed so no further action is needed.
Select the Type cell on the far left of the mail and press CTRL+ x OR right click on it and select “Mark as spam”:
If you want to access an email that has already been marked as SPAM, select the “deleted” status from the status filter to view all deleted emails.
Workflow
- Select the type cell on the far left of the inbox email row
- Press CTRL+X OR right click and select “Mark as spam”
- Email will status will be changed to Deleted
- Email content field in the “email assignment” container will be updated to Spam
- Refresh the page and the email will be gone
- View deleted status email to access an email accidentally marked as spam
A receipt can be rejected by changing its status from the receipt details container menu:
Once a receipt’s status has been changed to “Rejected” it will also be marked as released and exported. An activity will also be created and logged to inform other user the Receipt was rejected.
“ReceipEmail” type templates can also be created with preset messages to inform the contact why the receipt has been rejected. Select “New Email” from the “Receipt Email” container menu to trigger a new email and select the required template from the drop down menu.
Planners can create and edit receipts for invoices that relate to their own projects. Accounting staff can also create internal ToDo’s to give planners access to receipts.
Receipts may be created to pay incoming invoice from suppliers or to reimburse employees. They are created in the same way an invoice or quote is written, except the items are for outgoing payments not fees to clients.
All attachments added to a receipt must be in PDF format.
Receipts created within Project Documents
Planners can also create receipts directly within a project under the project documents container.
Once a project has finished and the planner has cleared the position it is ready to be added to an employee’s payroll.
Payrolls are generated for all active employees for a chosen period and then all cleared items within that period can be added to their individual payrolls in a single click. The accountant can then check each payroll and make any adjustments needed. Once all payrolls have been completed a notification can be sent to all employees simultaneously, the payroll details pdf can be generated and once the rights are set to ‘a’ it will become available for the employee to download via the app.
Depending on the user’s preferred workflow the payroll documents can be automatically generated and the rights set to a when the notification is sent, this is determined by the email template type used, see here for full details
https://wiki.squidweb.info/index.php?title=Templates#Payrolls
SquidWeb’s mailbox is an integrated email system that allows for the creation and processing of mail for public or private mailboxes – an address can be created for individual team members or company departments.
As well as being a fully functional email client- allowing users to read, filter, reply, forward and create emails – Mailbox allows users to assign an email to other destination within in SquidWeb:
An email can be assigned to a specific category such as ‘Projects’, ‘Invoices’ or ‘Receipts’. Once a mail is assigned to ‘Projects’ for example, it may then be attached to an existing project or a new project can be created directly from the mailbox page:
To create a project directly from the mailbox page, right click the email in the email list or its attachment, the email must have the status ‘assigned’ or ‘received’.
Emails and their attachments will be accessible from their assigned destination.
Mail- Appointments enable to send a new email or replying to an existing email chain, with the option of adding a Jitsi meeting appointment which will be automatically added to the calendar authorized via Squid, which is in most cases Google Calendar.
Show email history can be used to quickly identify the history and all statuses connected to an email chain. It can be seen under the specific email and on the right hand side Email history container:
Draft emails can also be created to prevent email lose. If SquidWeb is accidentally closed, or refreshed, for any reason while an email is being written, a draft email will be created to store the email. Saving the content of the mail to be sent later. Once created draft emails can be accessed by selecting the number in the email list container header. Clicking on this button will filter the email list to show only mail with the status “Draft”:

Draft emails can also be filtered by selecting “Draft” from the status filter in the email list header. For details on how to display and interact with the status filter, as well as full details on all other Mailbox features, layout and functionality, watch our tutorial video here:
Supplier receipts differ from normal receipts as the project crew items need to be assigned to the receipt during its creation.
When suppliers send an invoice for a crew service a supplier receipt is created to pay the outstanding amount. As the PCI’s from the project are added to the receipt the sum total will be automatically calculated and updated, this allows you to check the suppliers invoice against your project data and be sure there are no mistakes.
A bank transfer can be added directly to a receipt to pay the supplier and send notification at the same time.